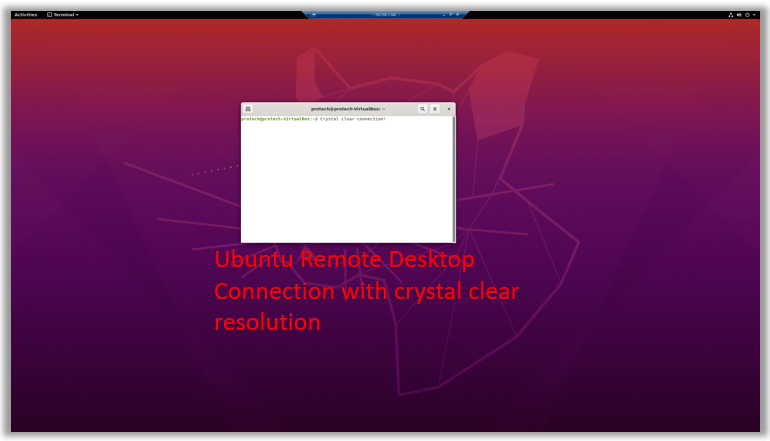
This step-by-step article will detail how to establish a Remote Desktop connection from Windows to Ubuntu running in VirtualBox with pictures as a guide. The Ubuntu VM used in this guide has not been modified since it’s installation in VirtualBox, outlined in the post: Create Ubuntu VM in VirtualBox – Picture Guide.
Verify Windows Host / Ubuntu VM Connectivity
Before installing software on our Ubuntu host, a network interface needs to exist that will allow the host machine (Windows) to be able to communicate with the Guest machine (Linux VM).
Determine if you need to add an additional interface allowing connectivity between your Windows host and your Ubuntu guest VM.
- In Ubuntu, open a terminal and check your interfaces. A quick command to consistently check all interfaces in Linux is
ip -4 a - The example below shows that this Linux VM only has one interface, with an IP of
10.0.2.15.

- Now, check your ip address on your Windows machine using the command
ipconfig. Chances are it is a 192.168.1.X IP as shown here
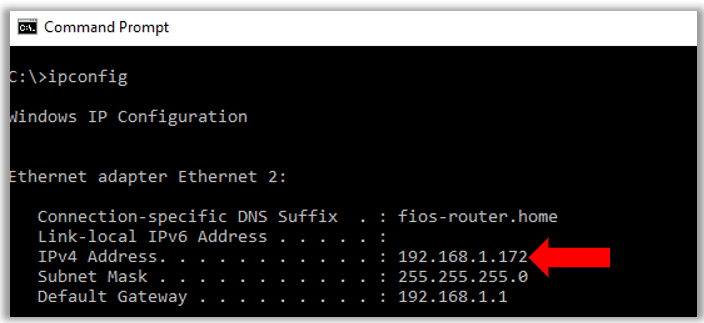
As you can see, the IP address of the Windows machine, 192.168.1.172, and the IP address of the Ubuntu VM, 10.0.2.15, are not on the same subnet. In order to establish a remote desktop connection between this Windows host and Ubuntu VM, we must add an additional interface to the Ubuntu VM that is on the same subnet as the Windows host.
We cannot simply change the IP address of the existing Ubuntu network interface. The existing interface is used to communicate with VirtualBox.
Create a Network Interface Enabling Windows/Ubuntu Connectivity
- In VirtualBox, shutdown the Ubuntu VM
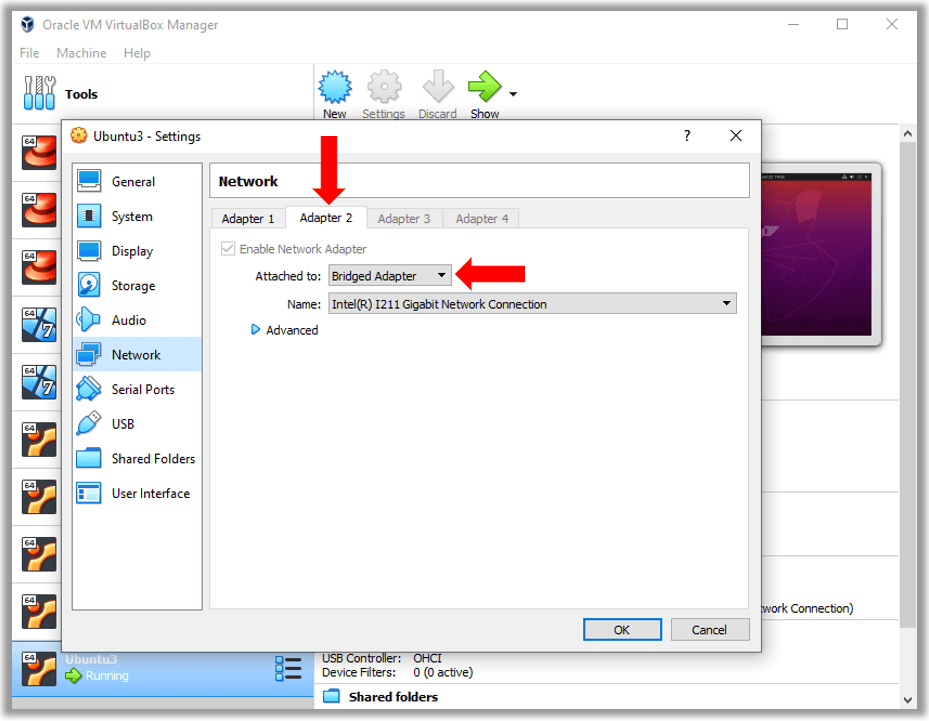
- In VirtualBox with the VM selected, select Settings > Network
- By default, Adapter 1 may be the only interface running. Select the Adapter 2 tab.
- Check the box next to Enable Network Adapter.
- Select Bridged Adapter as the option for the Attached to: option. No other options needed, select Ok.
- Start the Ubuntu VM back up
- Open a new terminal window and
run ip -4 aagain.

- After adding the additional bridged adapter in the VM’s settings, this Linux host now has a network interfaced enp0s8 with an IP address of
192.168.1.194. - Optionally, ping the IP address from a Windows command line for additional verification of network connectivity.
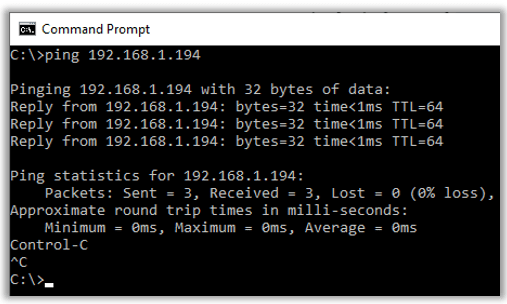
Ping reveals that these two machines are able to communicate with one another. Its time to start configuring the Ubuntu machine for Remote Desktop connections from the Windows host.
Configure Ubuntu Firewall for Remote Desktop Connections
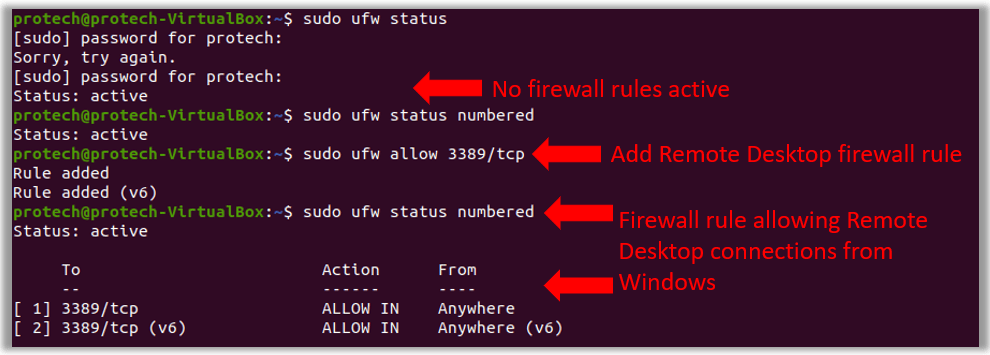
- Remote Desktop communicates over port 3389. So, add a firewall rule opening up port 3389.
sudo ufw allow 3389/tcp
Install xRDP in Ubuntu
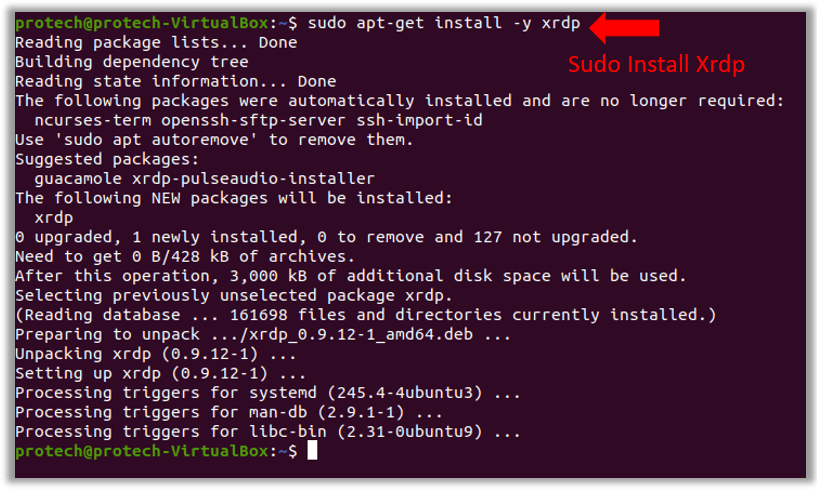
The installation of Xrdp on a Ubuntu VM will allow Remote Desktop from Windows machines.
- Install Xrdp.
sudo apt-get install -y xrdp
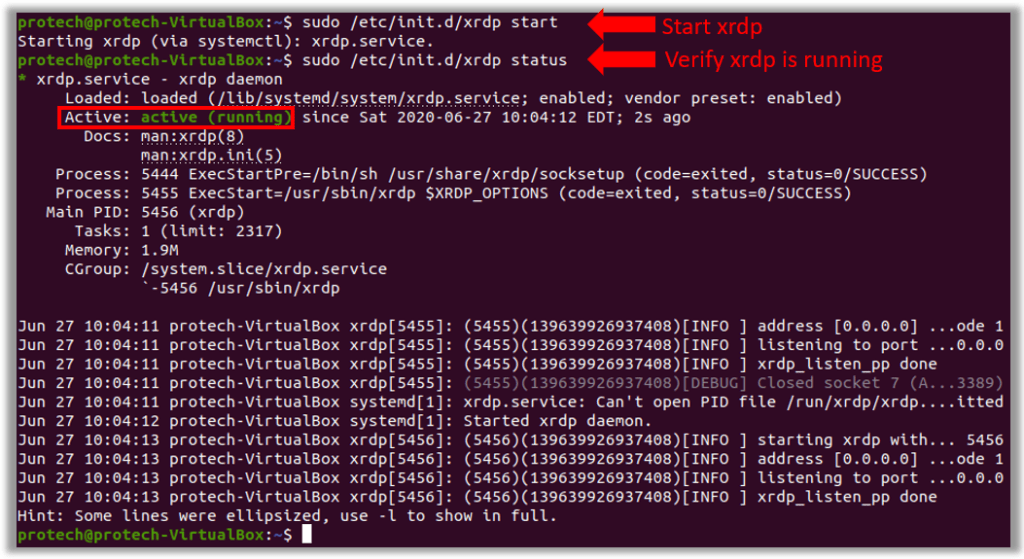
- How do you start xrdp in Ubuntu? It’s not with systemctl.
- Without additional configuration, Xrdp is managed via /etc/init.d/xrdp start, stop, restart, try-restart, status, and fore-reload.
- Start the service with
sudo /etc/init.d/xrdp start, thensudo /etc/init.d/xrdp status
Done! Time to remote desktop in!
Create a Remote Desktop Connection from Windows
- Logout of your Ubuntu session. With a default configuration, you will not be able to stay logged in to the VM from VirtualBox and also open a remote desktop connection from Windows.
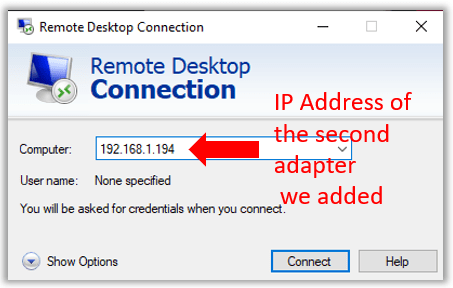
- On Windows, open Remote Desktop, and enter the IP address associated with the second network adapter that we created previously. In this VM, it was
enp0s8, with an IP address of192.168.1.194.
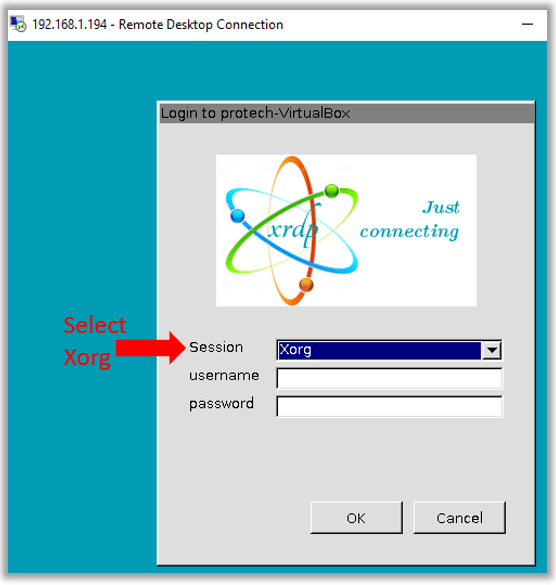
- Once you select connect, the Remote Desktop screen will appear. If you have not modified the configuration of the xrdp.ini file on the Ubuntu host, change the connection type to Xorg.
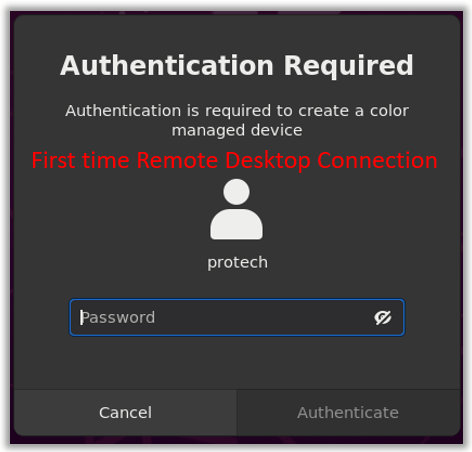
- Once you enter your username and password, you may be prompted with a message that says “Authentication Required. Authentication is required to create a color managed device”. Reenter your password and press Authenticate.
- DONE! Look at that high resolution Remote Desktop from Windows.
